8.26.2010

Men's to Mine T-Shirt...Part 2

I'm sure you have a few t-shirts folded somewhere that are just too big.  You like the design on the front, but can't bring yourself to put them on, unless your going to paint or do something dirty.  Here is how to make the shirt into a fitted tee, without too much hassle.

Put the shirt on inside out.  Stand in front of a mirror with some safety pins.  Now pin...
 
Start with the shoulders, pin where you want the seam to be
Next pin under your arms, not too snug but not too loose
Pin each side.  I started at my armpit on my right side with one pin, then moved to the left side.  I didn't want the shirt to be uneven, or pulled too much to one side. Work in a zig-zag motion pinning one side and then the next.
Take off shirt and mark the shirt. 
 
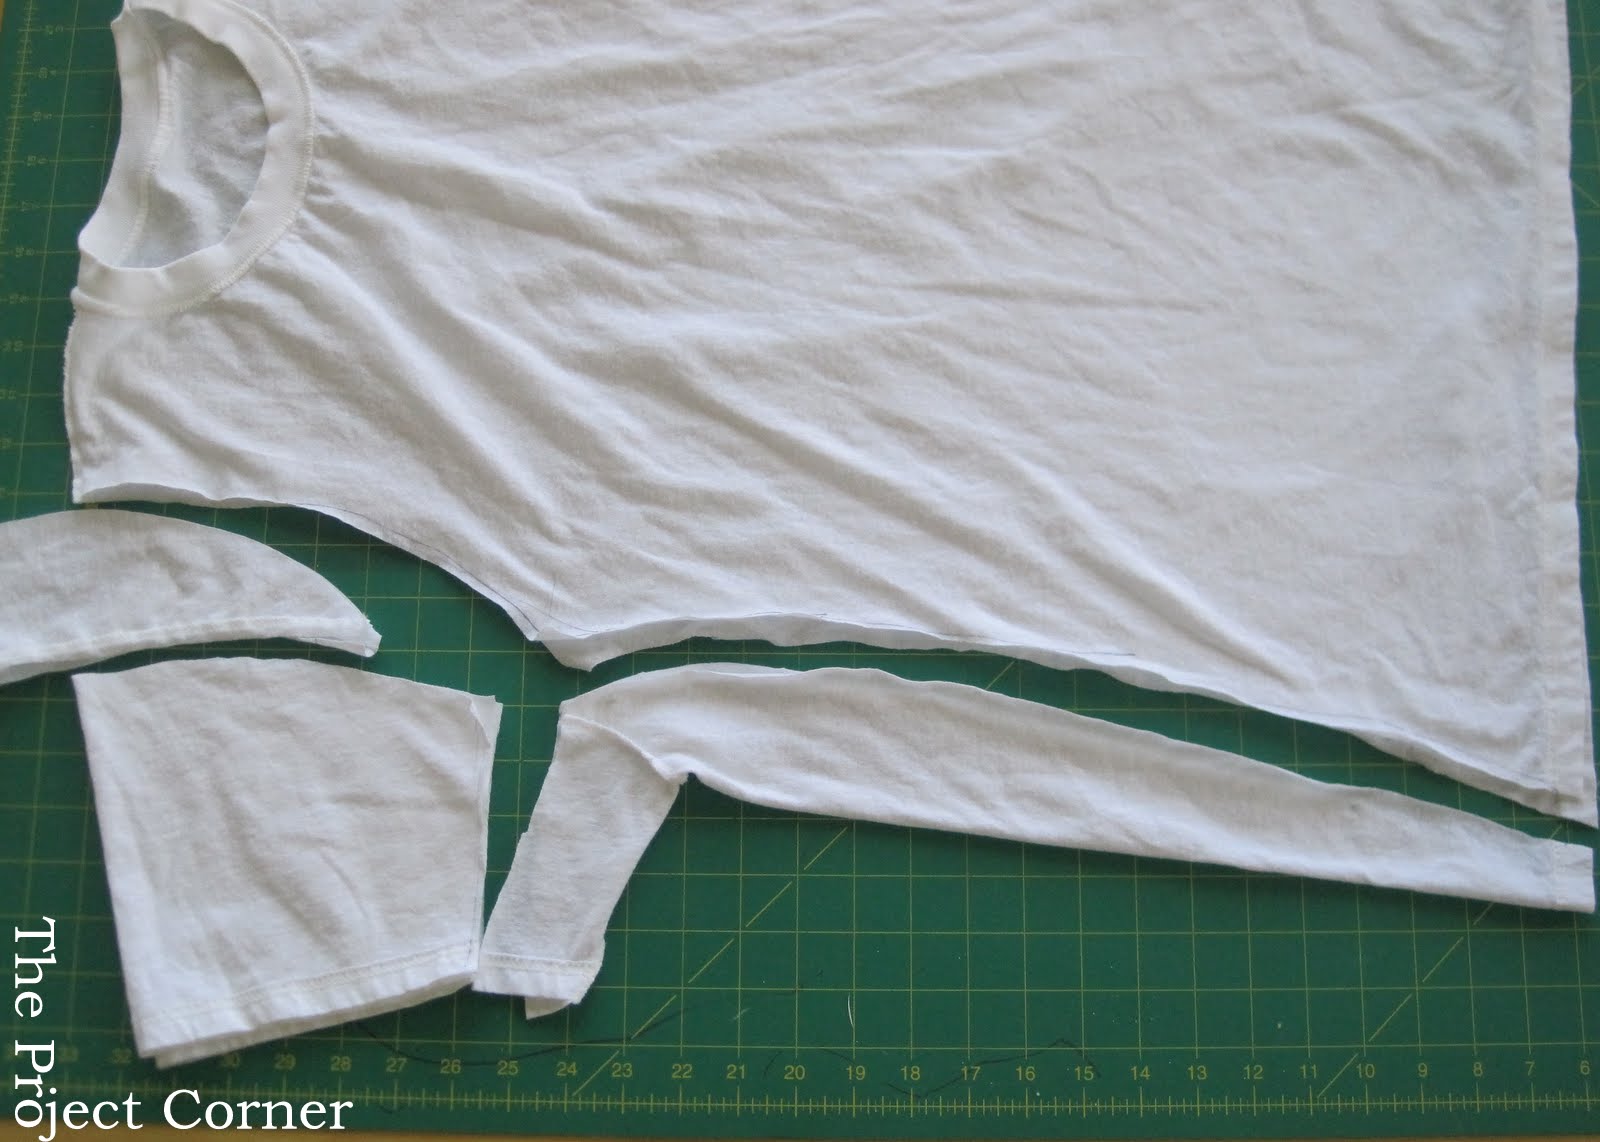
Cut. Add a little on the sides and armpits for a seam allowance. 
It is easier to take it in than to wish you had more room.
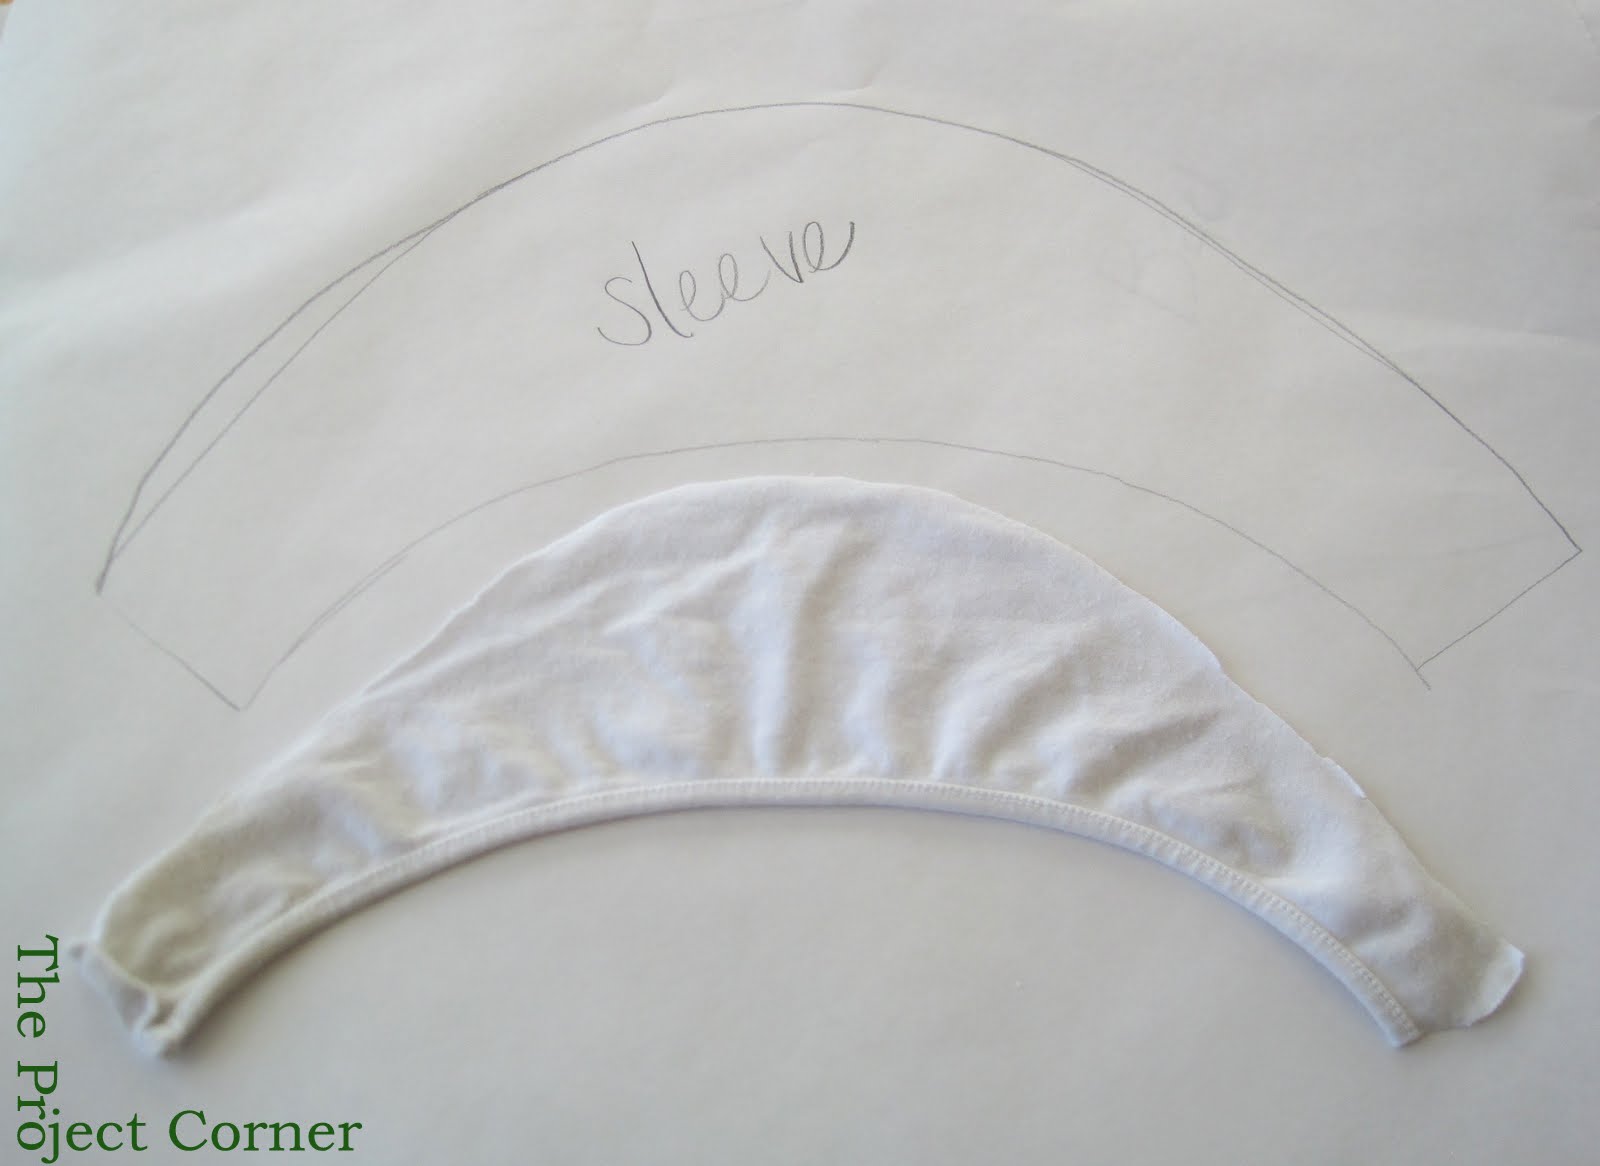
Lay shirt out flat and pin sleeve to armhole, right sides together. Sew just the sleeve.
With sleeve sewn, put right sides together and pin some more. Sew.
Try on.  This one is a little tight.  Next time I will do the sleeves differently.
Ta-Da!


8.23.2010

Men's to My Shirt...Part 1

Every time I have walked into walmarto in the last month I have been drawn to the school supplies, not because I have a single child in school, but because the prices are ridiculously low.  Who can pass up 4 glue sticks for a dollar?  Washable markers for $2?  So to help my budget stay on track I have tried to avoid that area and just stick to the food area.  But they got me with other "back-to-school" items, not even school supplies.
Later this week I am teaching a class on how to refashion and re-use old clothing.  I have been on the look out for cheap inexpensive shirts to demonstrate with--and thanks to walmarto, I now have lots.  At first I was looking for colored shirts, but really didn't find shirts that I wanted to pay for.  But I stopped my limo-cart mid aisle when I looked at the men's undershirts on display at the front of the store and calculated that a pack of 7 shirts for $7 meant that the shirts were $1 a piece.  Hmm, sounds good to me. 
So for the next little while I will be posting my projects of refashioned shirts, hence the title Men's to My Shirt


First up...

Basic T
Here's the Men's XL Shirt after it has been washed and dried, I wanted to make sure it wouldn't shrink.
(Do you like the blue in the background? We're trying to figure out colors to paint the kids bathroom.)

Using one of my favorite shirts I traced a pattern on freezer paper.  I added a little to the length and side--easier to tailor a shirt if it is too big, right?
Sewing the shirt was basic.
1. Shoulder to shoulder
2. Sides to sides.
3. Sleeves to armhole (right sides together).
Make sure you cut out the bottom of the shirt along the hem of the shirt so you don't have to hem.  I did this with the body and the sleeves.
Using the sleeves from the shirt I cut off from the top and the inside edge.  I stacked both sleeves on top of each other to do this to make sure the sleeves matched.
Ta-Da!  Fitted shirt with cuter sleeves
 Not too shabby.  Now I have a basic pattern that fits me perfectly. 
Next I will show you another way to make a big t-shirt a fitted shirt.  This time without a pattern.


8.21.2010

Featured Again

Roeshel over at the DIY Show Off blog feature the kimono towel cover up today.  Check it out here...

8.20.2010

Towel Samari Cover Up

The kimono cover up was for my little girl.  So to make things even in the household my little guy needed a cover up too.  This one doesn't have ruffles and covered buttons so it needed a different name.  
The robe part is made the same way I made the white one.  Because there wouldn't be ruffles on the bottom I made sure the hem of the towel was at the bottom when I cut it out.  I used leftover bias tape from a quilt, meaning it was already ironed so I just had to sew it on.  

The hood is a hand towel sewn up in back and cut to shape.  The top of the hood is wider than the bottom where it is sewn on to the body.  This allows for some head movement.
Since I wasn't using covered buttons I had to have something to help keep it closed.  I cut a 5" strip of fabric and sewed it on.  One side is sewn all the way to the edge the other is only sewn to about halfway on the front--helping it to close on one side and completely cover him up.
He looks like a little Samari warrior when the hood is off...
But a Jedi when it is on.

4th of July to Fancy T

You have one of these don't you?  Or two or three?  I like the 4th of July "flag" shirts for the fourth of July and for painting.  I'm not a fan of dates, pictures or prints on shirts--it's just not my thing.
 When I first started reading blogs I remembered Sachiko over at Tea Rose Home covered up her 4th of July t-shirt with ruffles and made it look so cute.  So this year I found some 4th of July shirts at Old Navy for $2 and wanted to give this project a try.
My ruffles all cut out.
Instead of doing a ruffle around the neck I pleated, pinned and sewed a strip of fabric.

What do you think?  Next time I do this I will taper the ruffles to help taper my waist too.  Overall this was a fun project and a great way to refashion a shirt.

8.12.2010

Birthday Card or Picture Holder

At my family reunion in July we did a craft, or we were supposed to (Thanks Katie for putting it all together!) I decided to go fishing instead, so my mom picked up the supplies.  After the reunion and before I drove home my mom, sister and I stayed up until 2:30 mod podging and vinyling.  I finally got around to drilling the holes and putting the wires in.  I'm excited to use the birthday one in a few weeks.
Each side is painted a different color.  We used colorful birthday scrap-booking paper cut into strips for the front.
I ran out of wire on this one, but you get the idea.  Eventually there will be 14 wires in this one.
If I were to do this again I would use just one piece of wood and have two different sayings on it.  Other people had different sayings, and will use them to display pictures.

8.10.2010

DIY Stamped Necklace

I've seen these stamped necklaces everywhere and haven't wanted to dropped the $$ to pay for one.  Then I found out that you could buy the stamps for a relatively good price on amazon.  Last week while perusing some blogs I found out that you can buy a stamp set for $4.99!  That's right ladies and gentlemen a stamping set for under $5!!  So I convinced my husband, or subconsciously made him think he needed to go to Harbor Freight.  It wasn't a hard sell because like most husbands mine likes to go to hardware stores.  So off we went and I found this little set...
I forgot to look for washers while I was there so I had to make another trip to a different, closer store the next day to pick out some washers.
Here are the supplies: hammer, washer, permanent marker, steel wool & stamp set.
I did my stamping outside so I didn't mess up any surfaces in my house.  I am anxious to try this again to perfect the art.

Looks fun doesn't it?
Now color each letter making sure to get ink in the crevices.  This dries fast so on to the next step.  Rub the washer with steel wool, this will take off the excess ink and shine the washer too.
Now you can make a necklace out of it.  I'm sure there is some way to drill a hole in it, but my little helper was helping a little too much to try it.  I made a necklace out of DMC floss.
Next time I will cut longer lengths.  When I was little I learned how to tie bracelets, I don't know what the technique is called, but it's super easy and fast.  Here is the end product:

8.09.2010

Baby Bonnet

My cousin-in-law, the one I just made the quilt for, had a shower Saturday night. I wanted to make something that she would like. 


Using a small tablecloth from my husband's-uncle's-mother's stash, that I inherited, I made a bonnet.   
The scalloped edge gives it a feminine touch, while the pin-tuck makes it classic.
I also made a bonnet out of white broadcloth.
With a touch of lace.
I hope she enjoys them.

8.08.2010

8.05.2010

Whilry Girly Skirt-Mom Size

This fabric is so cute, it has a vintage feel with crisp coloring, bought from the last fabric store shopping trip.  To make the skirt my size I lengthened the panels and made the top 4 inches wide instead of 3.  This skirt took 9 panels, I used a zipper instead of an elastic waist.
Here you can really see a panel, the way the panels are cut and sewn together make it fall on a bias.  It gives it such a nice flow.
The waist and back sit perfectly, not too snug.
I lined the white up so it looks like a just sewed a white strip on to the red.  Each panel has a white strip sewn to the end then the panels are sewn together-almost like quilting.
My little girl took this picture.  She would tell me to smile, jump and twirl around just like I ask her to do it.  She is better at taking pictures with my little Canon Powershot, but it is coming back from the shop today :(

8.03.2010

Whirly Girly Skirt

I went to the fabric store yesterday to get out of the house.  It was pretty funny because my oldest learned that it was important to stay close to me.  She wandered off and pressed the emergency exit, she couldn't read the 10 signs surrounding it warning her not to touch it.  The sirens that she set off scared her, and she didn't leave my side for the rest of the visit in the store.  I was able to find some fun fabrics and made up a pattern for this skirt.
The skirt is made out of panels.  Each panel measures 4 inches at the top and 10 inches at the bottom.
I'm going to make the next skirt a bit longer, but my little girl loves how this twirls and bounces as she moves.
Isn't it a fun skirt?

I'm finishing up an adult version and can't wait to show you.

8.02.2010

Purple Rosebud Baby Quilt

My cousin-in-law is having her first baby girl next month.  She has two boys already and wanted to make something girly--but not too pink.  I suggested some stores for fabric and the amount she should get.  The funny thing is she bought fabric that I bought a little while ago.  So we will eventually have quilts made out of the same material.  We cut out strips of alternating fabric and just sewed them together.  For the reverse side we used the rest of the fabric as big blocks.  To divide the blocks of material up I made 4 inch patchwork strips of the two fabrics.  The design of the quilt is easy on the eyes and will be well loved.
I sent the quilt home with her so she could finish the binding.
I did a large stipple quilting pattern on the entire quilt, I can't wait to see it washed.
A small view of the front and back.
Related Posts Plugin for WordPress, Blogger...